- Home
- Archive: December, 2019
The Most Effective Way to Advertise With Classifiedsubmissions.com
The mosft effective way to advertise with Classifiedsubmissions.com is to use a landing page/squeeze page with an opt in form which leads to an autoresponder rather than directing people to your main web page.
For an autoresponder/landing page creator see https://www.quickregister.net/aweber
See here for a full tutorial both video and written with pictures and step by step instructions on “How to Set Up A Landing Page Cheaply Quickly and Effectively.“
You Only Have A Few Seconds To Grab Your Prospects Attention With Classified Ads And to Get Them to Take One Specific Action.
You only have a few seconds to catch somebody’s attention with a classified ad. If you overwhelm your prospect with too many options and information they will just click away and you will never see them again.
Give Your Prospects Too Many Choices and Too Much Info And They Will Click Away And Never Come Back!
If you go for the sale right away your prospect will either buy on the spot or never come back. It has been proven that prospects generally need 7 follows before they start buying.
It Has Been Proven That Prospects Need At Least 7 Follow Ups Before Buying So Start Following Up!
Is is much better to send your prospect to a squeeze page with just one goal of getting the prospect to give you his name and email. Or better yet just ask for email only.
The More Info You Ask For The Less Opt Ins You Get. Forget About Asking for Phone Numbers, Making Prospects Click Mulitiple Links, Long Forms With Lots of Questions Just Go For Email or Name and Email.
Then your autoresponder can follow up over and over with credibility building information. Even if you are promoting affiliate links like Clickbank links. You can use sales letters for your various affiliate products as follow up letters in your autoresponder series.
After You Get The Prospect’s Email You Can Follow Up Over and Over. You Will Have MULTIPLE Chances to Make Sales Not Just One.
They probably already have sales letters for you. And get prospects to join YOUR newsletter. Then if you change programs later you can always use that list to promote other others.
Here is a video tutorial on how to set up a landing page quick and cheap using Aweber autoresponder service:
We also have a step by step written tutorial here.
The important thing is to just get started. Do not worry about being perfect. You will get better as you go.
We would like to invite you to join our affiliate program. If is free to join and we pay 50% recurring commissions. Our service is improving all the time and is a very hot seller. We have paid out 10’s of thousands of dollars to affiliates. See here to learn more about our affiliate program.
Much Success,
Matthew May
Classifiedsubmissions.com
How to Make a Landing Page for Free Using Aweber Autoresponder Service
Using a landing page rather than a complicated website, no matter how well made, can be one of the most effective ways to advertise on initial contact.
Prospects are bombarded with competing advertising. Most people just click off a website never to return if you cannot focus your attention and take action.
Focusing your prospect on just one action you want him to take can increase your chances for a sale.
If the entire goal of your ad is to get the prospect to subscribe you then have the chance to follow up over and over building a relationship with the contact.
The problem is that many people find that creating and hosting landing pages is simply too complicated and expensive.
Using Aweber autoresponder service you can create a dead simple, yet effective landing for free for the first 30 days then just $19. per month after that.
This includes hosting of your autoresponder form as well. So there is no need for your own web hosting account though this is always good to have your own domain and hosting account as well.
Please see the video above for instructions on how to create your own landing page and autoresponder follow up series in less than 30 minutes.
Step 1. Sign up for a 30 day free trial account with Aweber here.
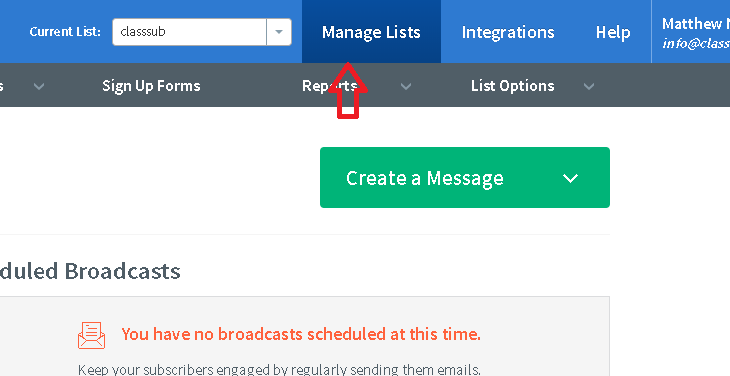
Ste 2. Log into your account and click on “Manage Lists.”
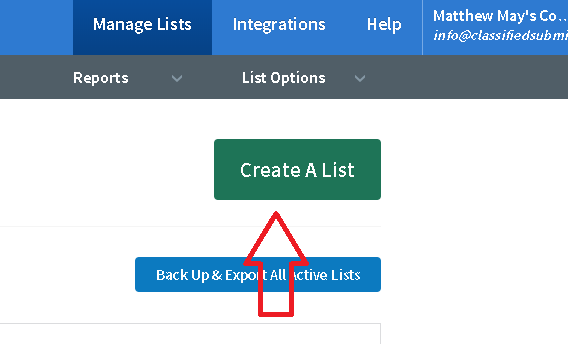
Step 3. Click “Create List.”
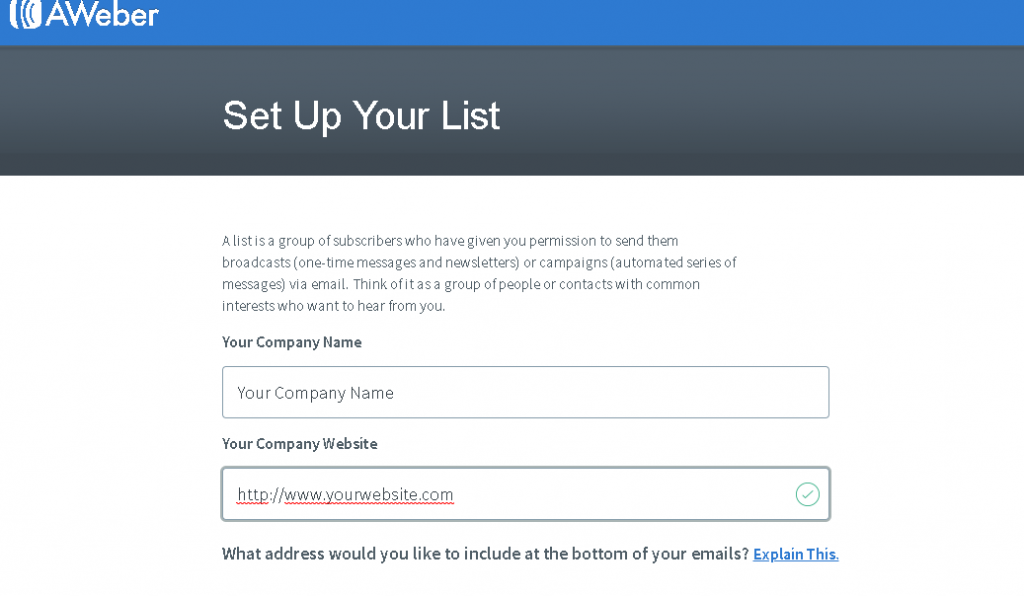
Step 4. Fill in your list details including list name, website if you have one, your mailing address and your list name.
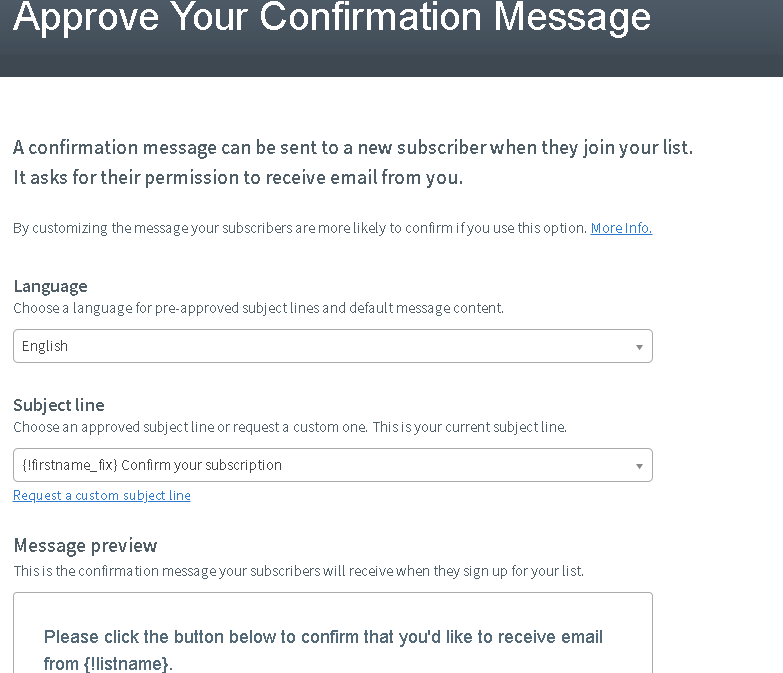
Step 5. Approve your confirmation message. When contacts subscribe to your newsletter they will receive a confirmation email. They must click on the link in the confirmation email to subscribe to your newsletter. This is called confirmed opt in. You can modify this confirmation letter during this step.
Click “Approve” and move to the next step.
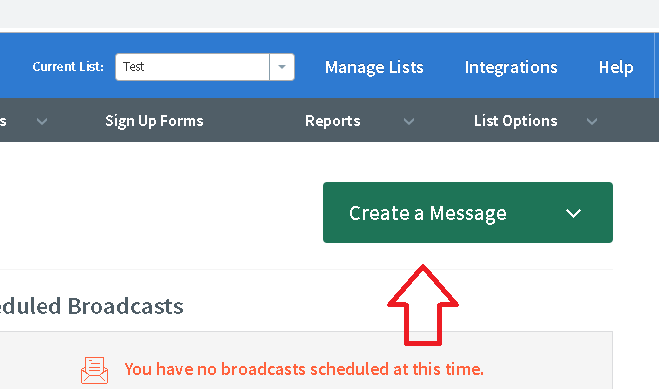
Step 6. Create your messages.
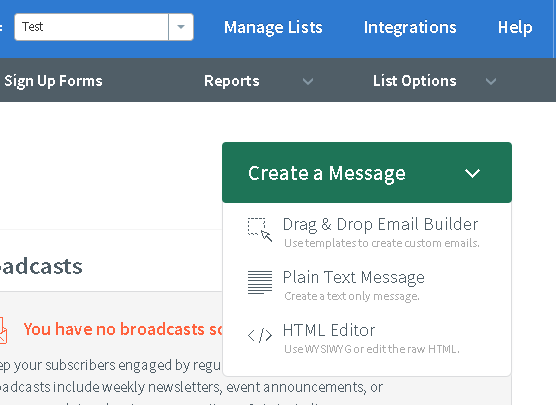
Step 7 Choose html or plain text.
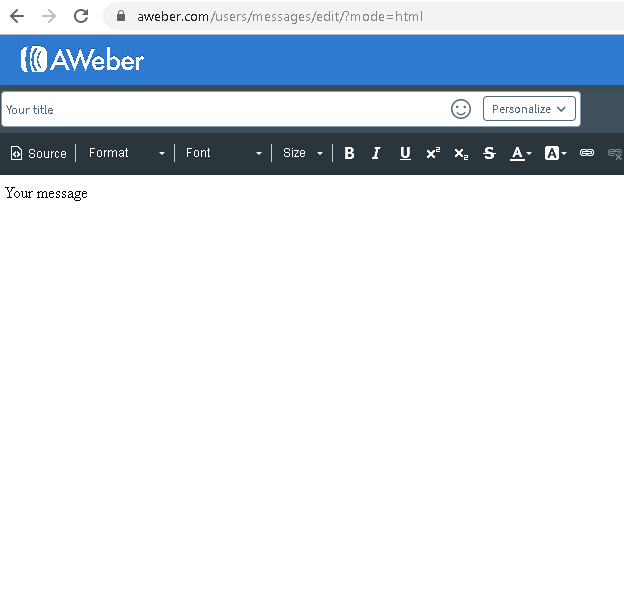
Step 8. Type in your title and message and click save and exit.
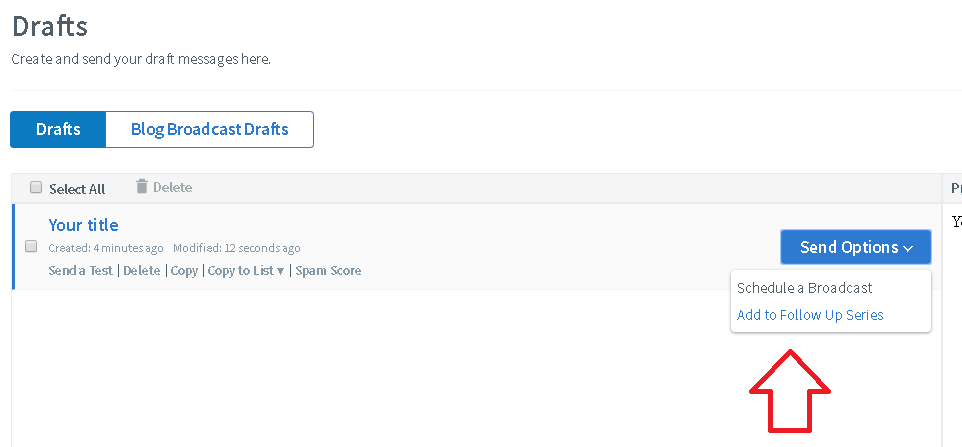
Step 9. Click “add to follow up series”
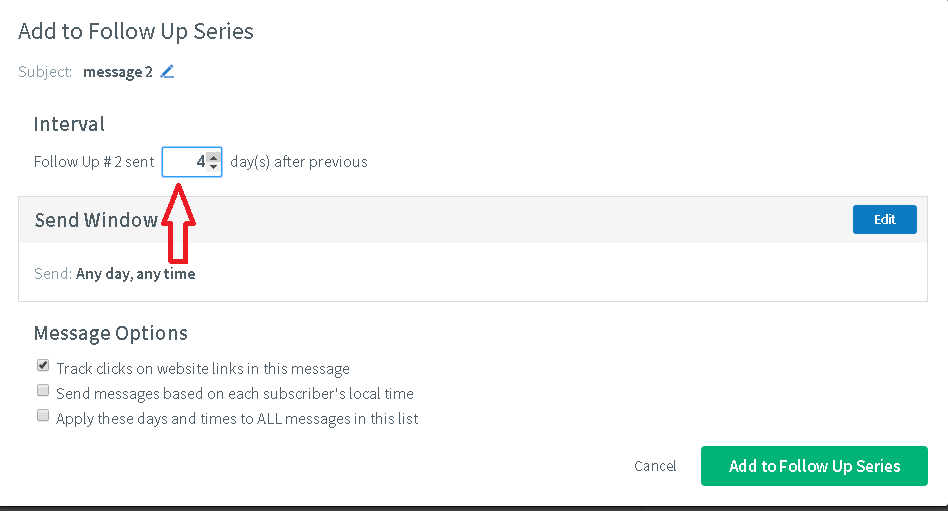
Step 9. Keep adding messages to the follow up series spacing them 4 days apart.
Step 10. Continue to ad more messages spacing them 4 days apart. We would suggest a minimum of 3. You can add more later. You need to get started right away collecting emails.
Congratulations! You have created a list. Now it is time to create your landing page and start collecting emails.
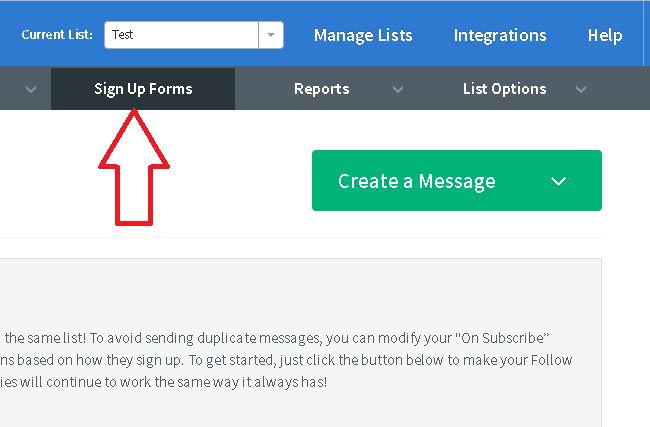
Step 10. Creating your landing page. Click on Sign Up Forms.
Step 11. Click “Create Sign Up Form”
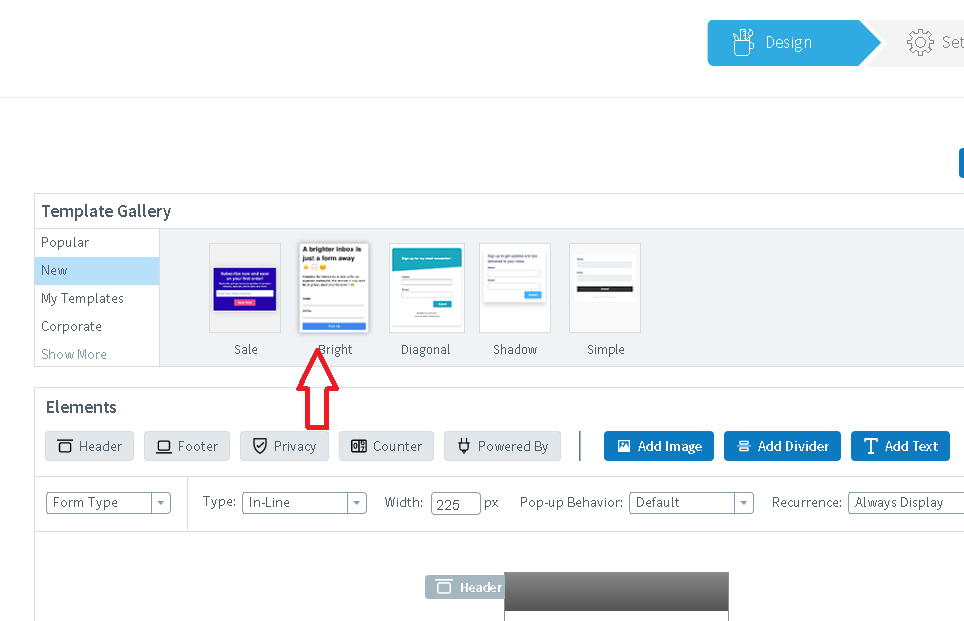
Step 12. Choose a Template:
Step 13. Modify the form to your needs.
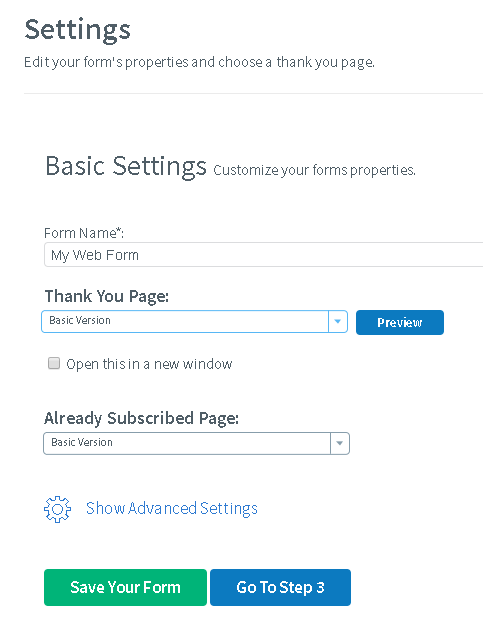
Step 15. Click Save Form Then Click “Go to Step 2.”
Step 16. Leave the settings as is or modify to suite your needs. You can change the url people are directed to after subscribing to your website if you have one. If not just leave everything as is and it will work fine.
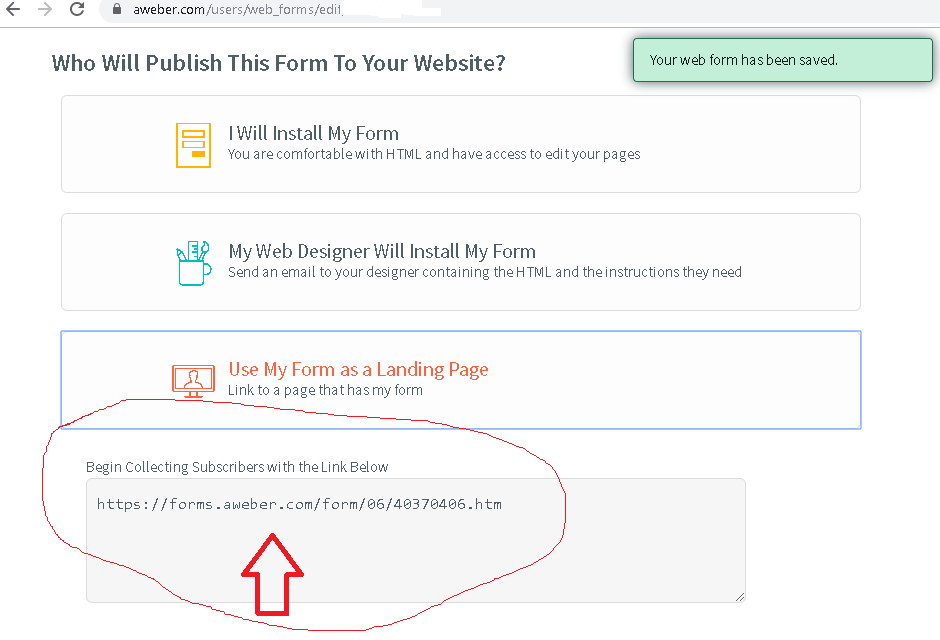
Step 16. Copy and paste your landing page url. Aweber will give you a specific url which has your custom landing page that you can use as your website to promote. Click save your form Go to Step 3.
That is it! Now you can promote your url and get opt ins to your autoresponder and build your list. Go ahead and get started and let us know how it goes! Do not try to be perfect just take action! You will get better as you go!
